Working directly from the GitHub website is the the recommended procedure because it is very simple compared to the procedure for working locally on the PC. It is the recommended option for Assistant Editors users. For Administrators or Chief Editors users, the option explained in the following pages of this manual is recommended.
Let’s assume an example where we will edit an article that has translation errors. The steps would be these:
- Enter your fork of the Urantiapedia project (
https://github.com/user-name/urantiapediawhere user-name is your username). - Navigate to any file you want to modify using the directory listing. In our example we are going to correct an error in a file that is in
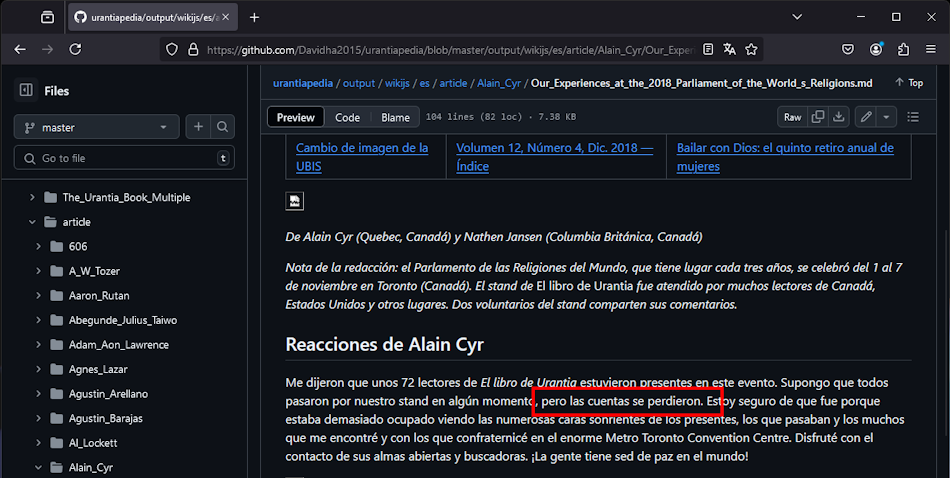
urantiapedia / output / wikijs / en / article / Alain_Cyr / Our_Experience.... Once in the file it can be read comfortably in its Preview mode, as shown in the image. There we found an error that says pero las cuentas se perdieron (spanish translation for but the counts were lost) instead of something more correct like pero perdí la cuenta (spanish translation for but I lost count).
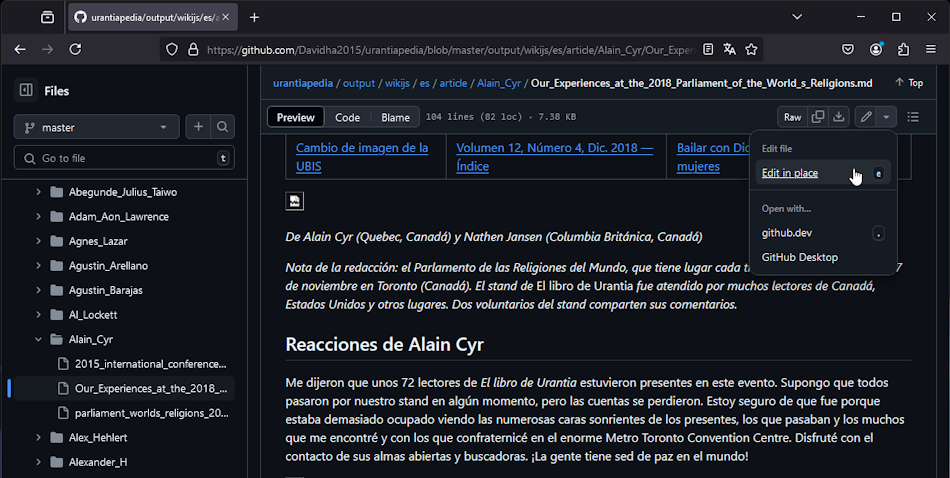
- Click on the top menu with a pencil icon and select Edit in place.
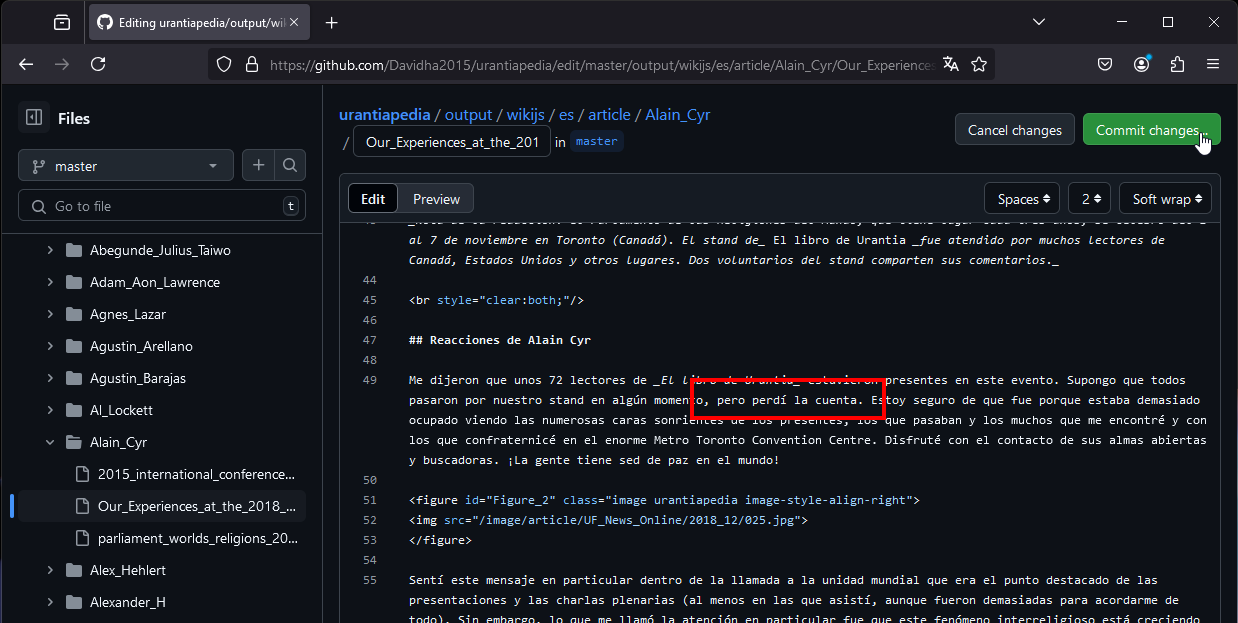
- You will enter edit mode. Find the text that was wrong and modify it. When you have made all the necessary changes to the file click on the green button Commit changes…
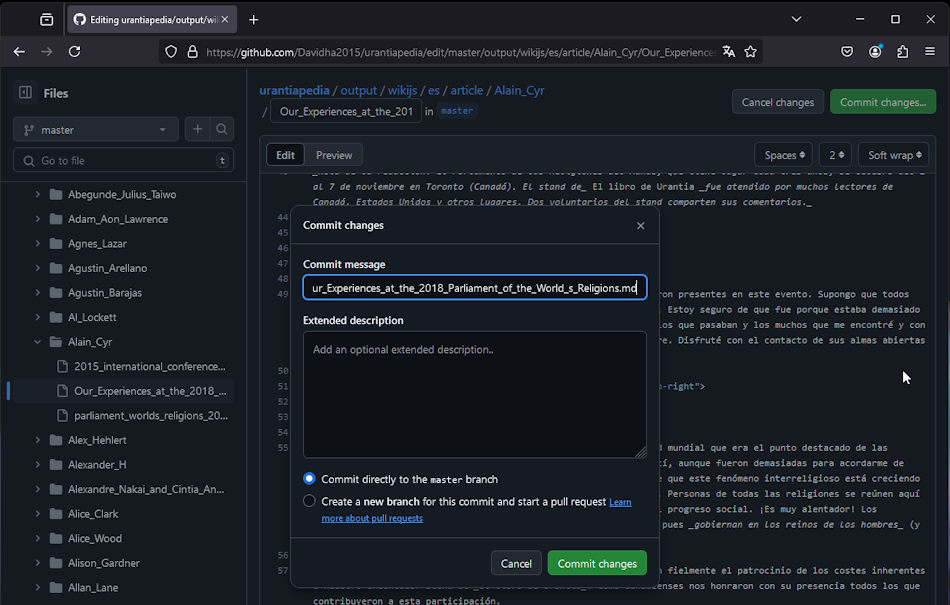
- You will be asked to confirm that you want to save some changes. Leave the default message or put a more descriptive message about your changes where it says Commit message. Keep the option Commit directly to the master branch selected (don’t worry about that since you are the only one working on your copy of the project). Finally click on Commit changes.
- Now we will create a pull request to send the changes we have made in our copy of the project to the original project. To do this, select the Pull requests option in the main GitHub menu. If it is your first time, you will see an empty list, as in the following image.
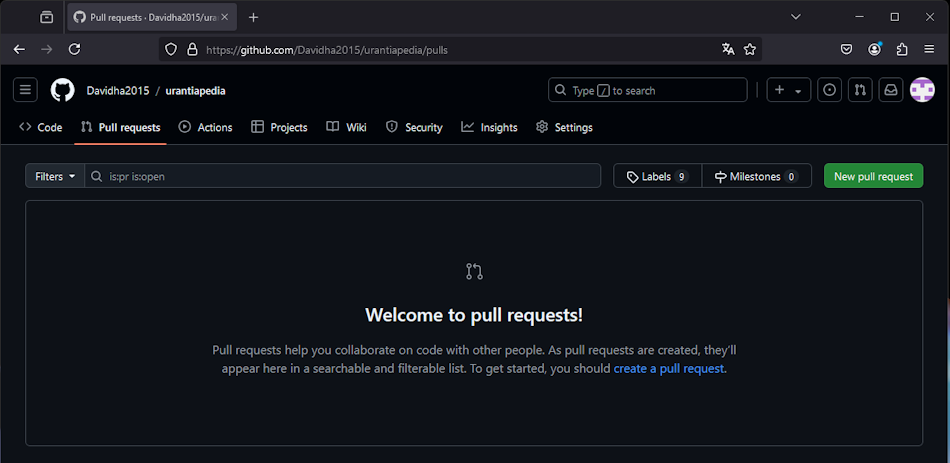
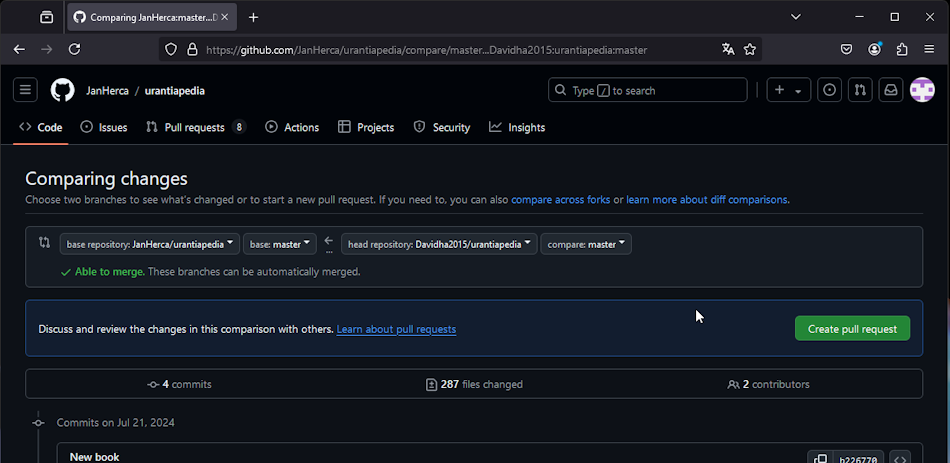
- Click on the green New pull request button to create a new pull request. A comparison screen between your changes and the original project will appear. If the comparison has not found any conflicts, an Able to merge message will appear. You can click on the green Create pull request button to finally create the pull request.
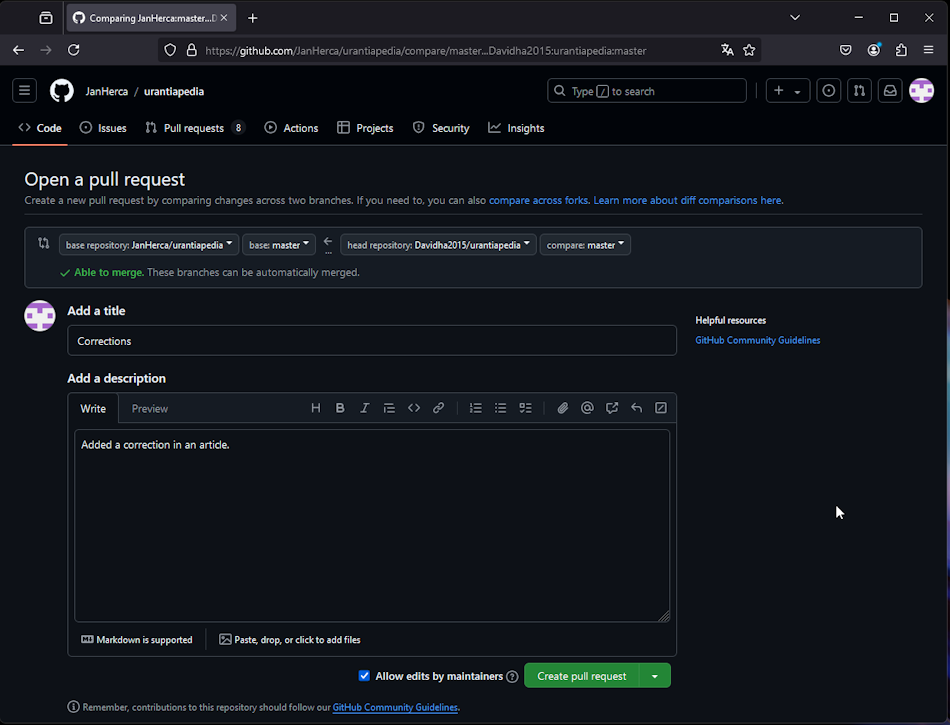
- A final screen allows you to enter a title and description for the pull request. Finally, click on the green Create pull request button to create the request.
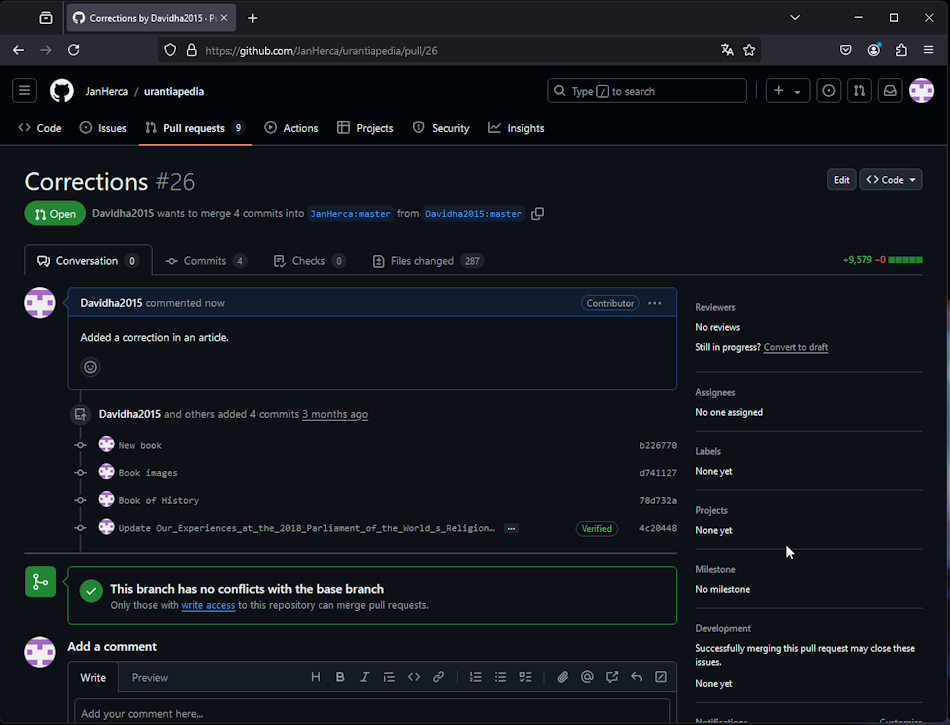
- The last screen takes us to the original project (note, we are no longer on the page of our copy of the project) where we can see the request for changes sent and added to the Pull requests of the original project. Now we just have to wait for the Administrators to accept or not the changes, at which point we will see the confirmation of acceptance in our pull requests list. This operation is not immediate, it can take days, but that does not mean that you cannot continue working, making new modifications and requests for changes, repeating the steps explained here. Your list of pull requests can be as long as you need.
IMPORTANT: All these steps in the urantiapedia project must be reproduced again in the urantiapedia-backup project whenever you want your username to be reflected in the project as the author of the changes. If this is not the case, you only have to introduce the changes in the urantiapedia project and the Administrators will take care of introducing the changes for you in the urantiapedia-backup project, which is the one that is synchronized with the website. In this second case, the Administrator user who uploaded your changes is the one who will appear as their author.
This duplication may seem cumbersome but it is necessary for security reasons.